
What a batch of badly painted signs taught me about preparation, spray paint and not rushing the process.
Every now and then I think about how much better I am at this job than when I first started. I mean, I’ve been through the hard stuff, learnt my lessons and recovered from my fair share of stuff-ups. Everything should be smooth sailing from now on, right?
And then bang, a job comes back like a slap in the face, making me feel like I’m back in the ’90s—a wannabe raver, trying to keep the bottom of my rave pants from getting under my sneaker heels and off the floor of a crusty, dark, Melbourne warehouse. Looking down at my feet under the strobe lights, trying to dance, thinking I’m doing the shuffle like a pro. I can almost still smell that talcum powder!
(strobe lights or not – I still can’t dance)
I wonder how I let something so bad go unnoticed. Recently, I experienced that feeling again. This is one of those moments.
“How did I even let this job go out the door?”
I asked myself.
I’d stuffed up the painting process. The signs were obviously all there, but I must have chosen to ignore them at first (pun intended).
A customer contacted me recently because she wanted to order another sign. I’d made quite a few for her over the years and she’s a very good customer. The last thing I wanted to hear was that my workmanship wasn’t up to scratch. But I have to admit, on this occasion it wasn’t.
I’m usually very careful about what I let out the door — a bit of a perfectionist, I guess. This can have its advantages in business, but most of the time it just slows me down. And when time is money, being self-employed, the last thing you want is for a job to drag on longer than it has to.
While finishing a batch of signs late one night, I somehow failed to notice an obvious flaw in the painting. These were custom made rustic cedar signs I’d made for the office areas at one of my best customers’ workplaces.
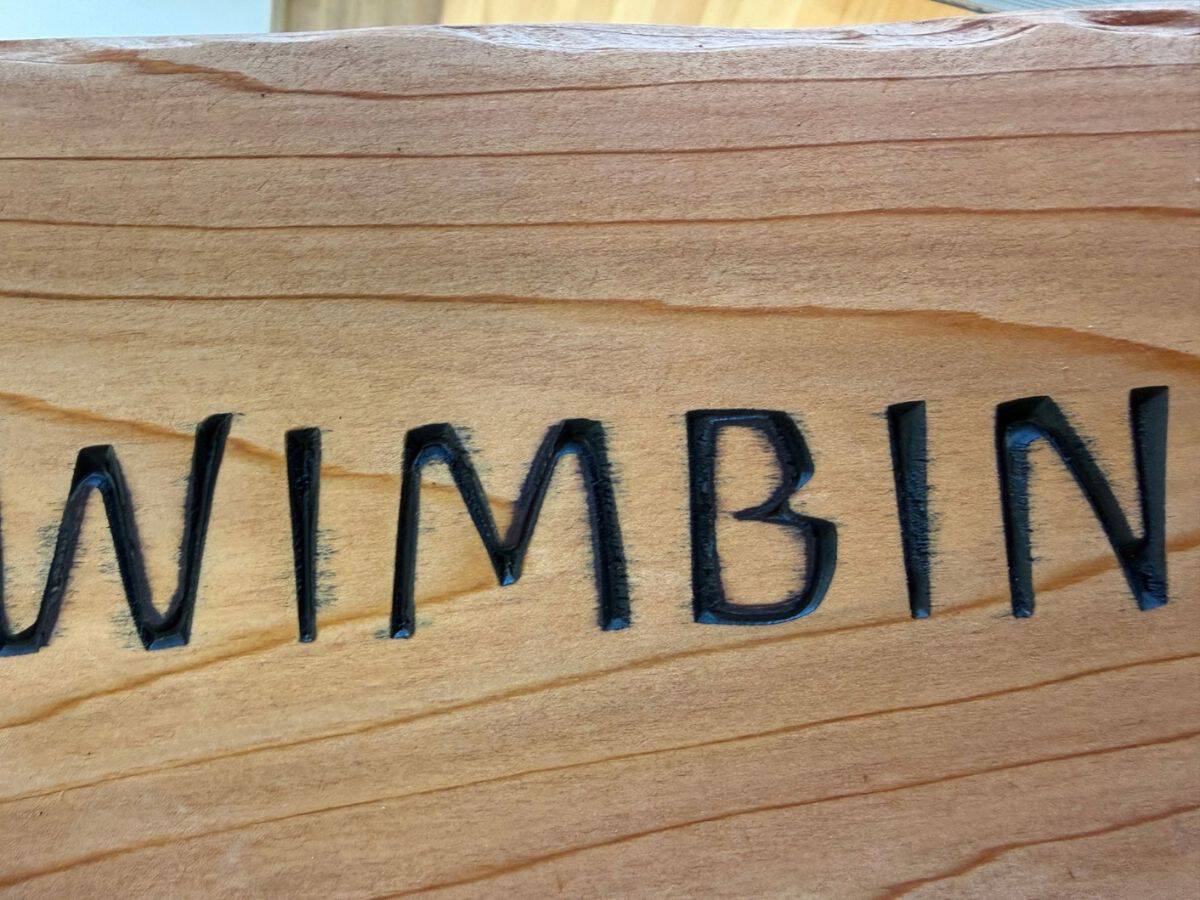
I might have said to myself, “I just need to get the whole batch finished tonight. I just need to meet the date I’d promised her… They look OK from a distance, don’t they?”
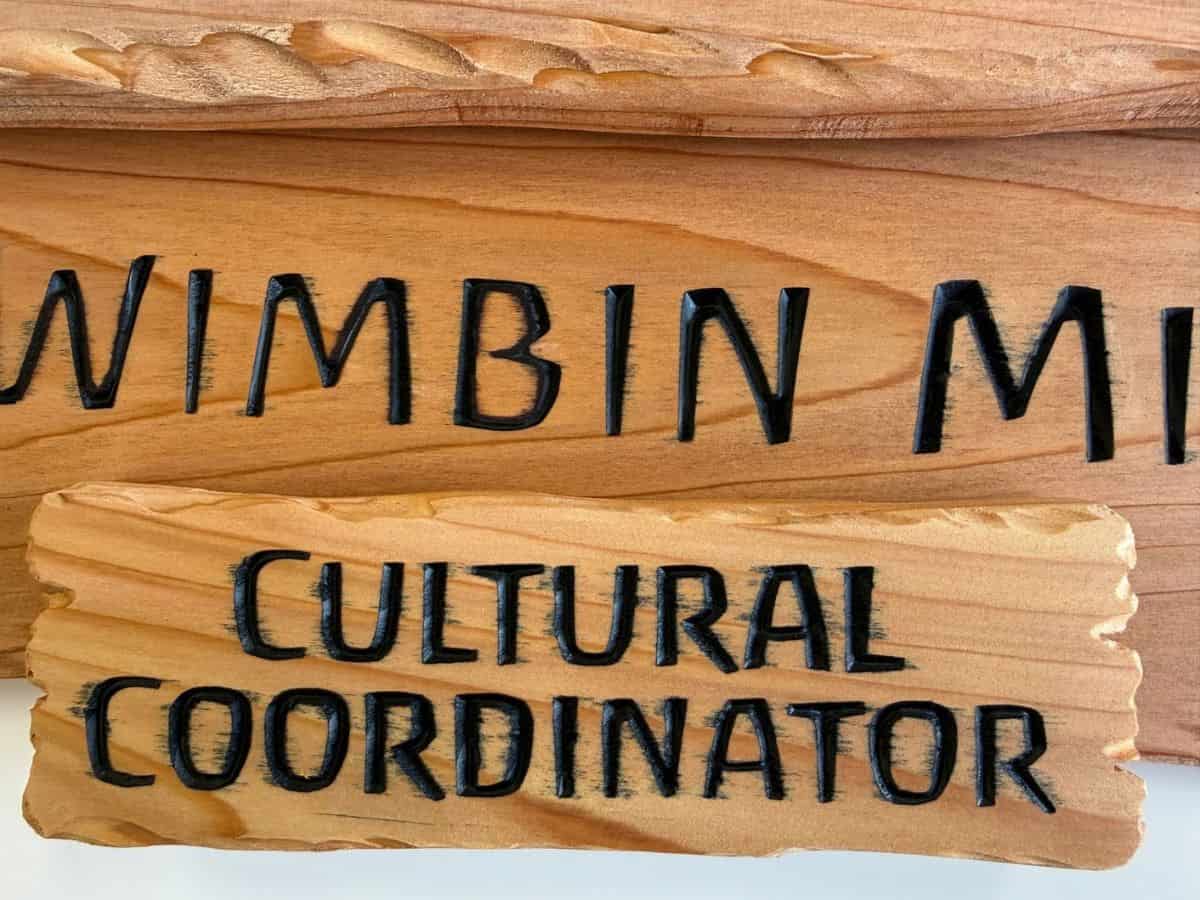
Looking at them now, I can clearly see why this wasn’t acceptable – the paint had bled into the wood grain and it was a bit of a mess.
I apologised and told her I’d make some replacement signs. I explained that sometimes I use different paints and that timber can do funny things, as it varies from piece to piece.
Who am I kidding?
Although that was partly true, I was making excuses. The truth is, I’d rushed the process. And for my own sake – and probably everyone else’s – it was a bit like forgetting to leave the cork on the fork.
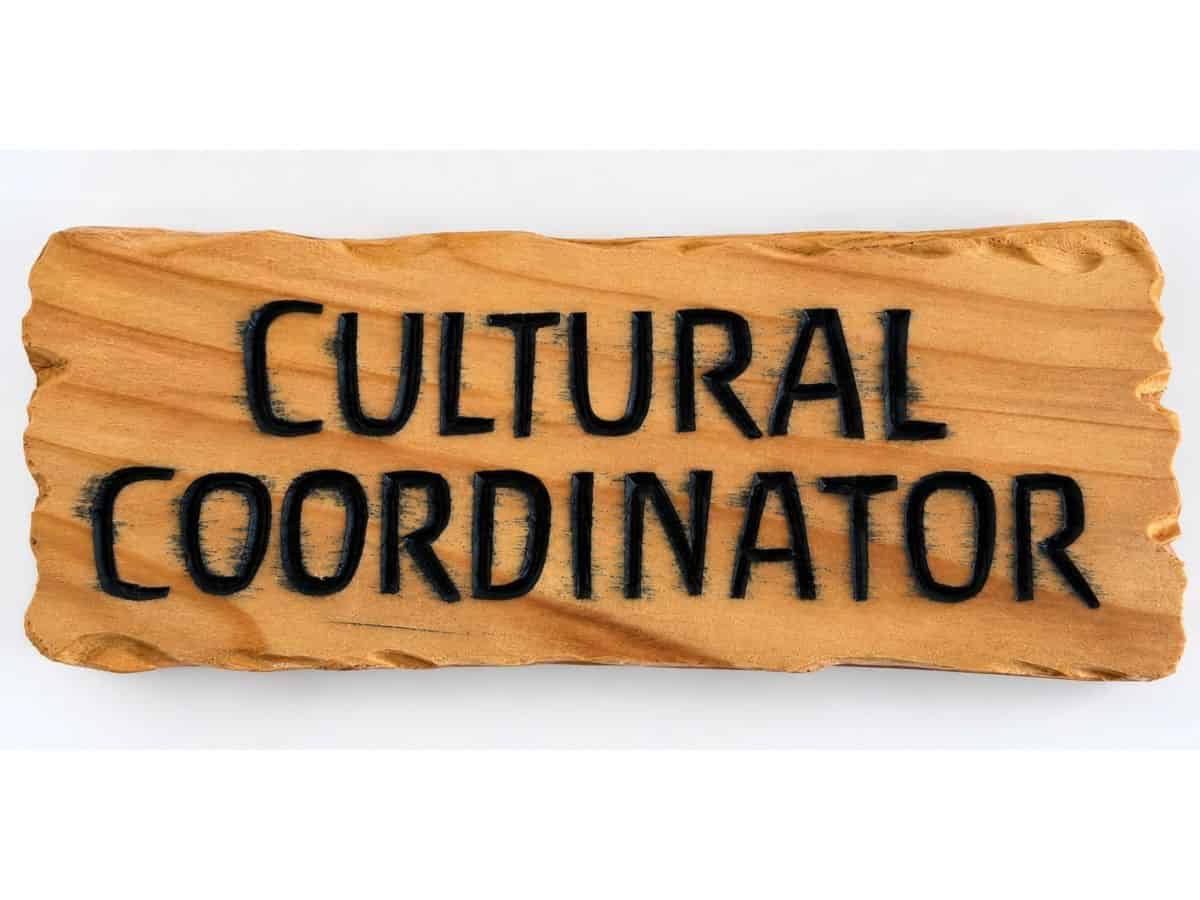
This looks worse in the photo than I remember, and I still can’t understand how I let it slide. Perhaps it got worse during transport. These particular signs were made for indoor use only, so perhaps she left them out in the rain causing the paint to smudge (she didn’t). My indoor signs are always finished and sealed well after painting and the paint never usually does this, especially after it’s fully dry. Besides, the paint I use for the lettering on most of my signs is an exterior paint. It can surely handle a bit of rain — my outdoor signs last for many years.
But the more I wondered how it had all gone so wrong, the more I came back to the same answer: whenever I take shortcuts, rush ahead or skip over the systems I’ve put in place, that’s when things can easily go wrong. That’s when I miss things that I should have noticed right away.
This was one of those times.
So today I want to talk a little about these systems and hopefully save you from making some of the same mistakes I have. This job reminded me of how much I had to learn. That became a key reason I began this blog—to share what I’ve learnt and help others, with a bit of ’80s humour mixed in.
The Painting Process
So let’s get to it. First of all, if someone asks me what kind of paint I use for the lettering on my signs, it’s not a straight answer. Of course I only use the highest quality paint but it depends on a few more things.
- How quickly does it dry?
- How well does it cover?
- What sort of finish does it leave – flat, matt, satin or gloss?
- Most importantly, how does it react with the timber and the finishing oil I’ll be using later?
There are quite a few things to consider, and I’ll cover many of them in more detail in future articles.
Why I Prefer Matt Black
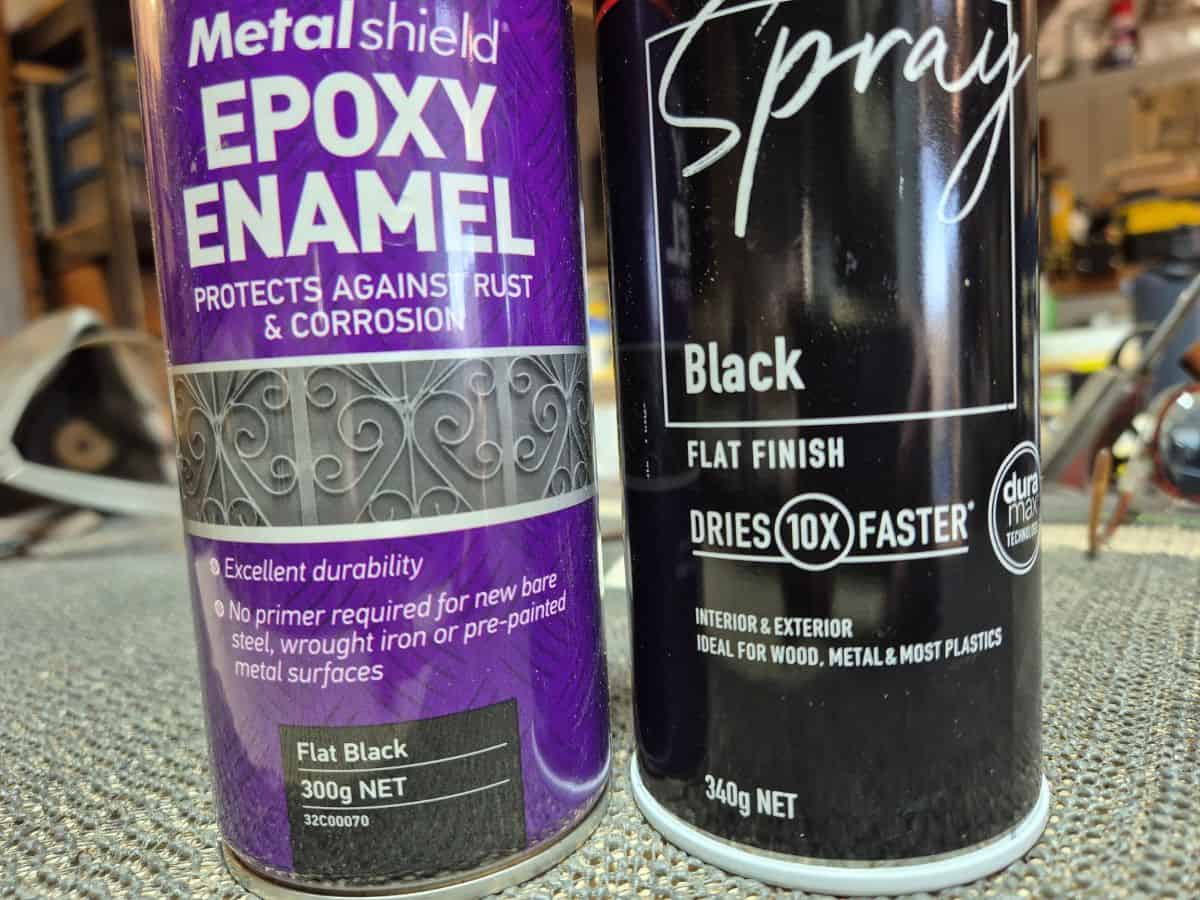
For black lettering, I generally prefer a quality epoxy enamel with a nice flat finish. Against natural timber, I think flat black looks fantastic. It almost gives the lettering a charcoal or burnt appearance rather than looking like shiny paint sitting on top of the timber.
The downside is drying time. You can wait until the cows come home for this stuff to dry. And depending on where the cows have been, that could be a while.
It says touch dry in 30 minutes, but in my experience it needs considerably longer than that before I’m comfortable moving on to the next stage. (especially in the winter months)
When I’m in a hurry, I sometimes use the faster-drying paint. The big advantage is exactly what the name suggests – it dries quickly. I can apply another coat within minutes and, if everything goes to plan, have the sign ready for the finishing stage later that day. (Multiple thin coats done by the time the cows come home.)
Which around here is usually about 3.30pm.
But there’s a trade-off. The paint sprays thinner, so it usually needs more than one coat to get good coverage. It also leaves a slightly more satin finish, which I personally don’t like quite as much as the flatter flat-black.
The can on the right should really be labelled Matt Black in my opinion as it is not quite as flat as the can on the left.
(read below for more info)
Neither paint is necessarily “better”. They just behave differently, and knowing those differences helps me choose the right one for the job.
One thing I’ve learnt is that choosing paint for a wooden sign isn’t just about colour. The paint has to work with the entire finishing process. It needs to spray well, stay where I put it, dry properly and, importantly, not cause problems when I apply the oil, polyurethane or shellac finish later.
On a side note, the very best paint I used during my first few years of making signs is no longer made in Australia. They changed the formula when they moved the factory to China. They never even changed the can – the label remained the same and I wasn’t happy after buying my usual stock of cans from Bunnings (local hardware store here in Australia) only to get home and find the paint just wasn’t the same. It was thin, smelled different and came out of the nozzle as a wet mess that dripped all over the place.
The sign looked like a dog’s breakfast. Anyway, I might talk about that another day. Let’s just say I was very annoyed that they could change the trusted brand I loved without even changing the label or alerting the customers to the change – misleading!
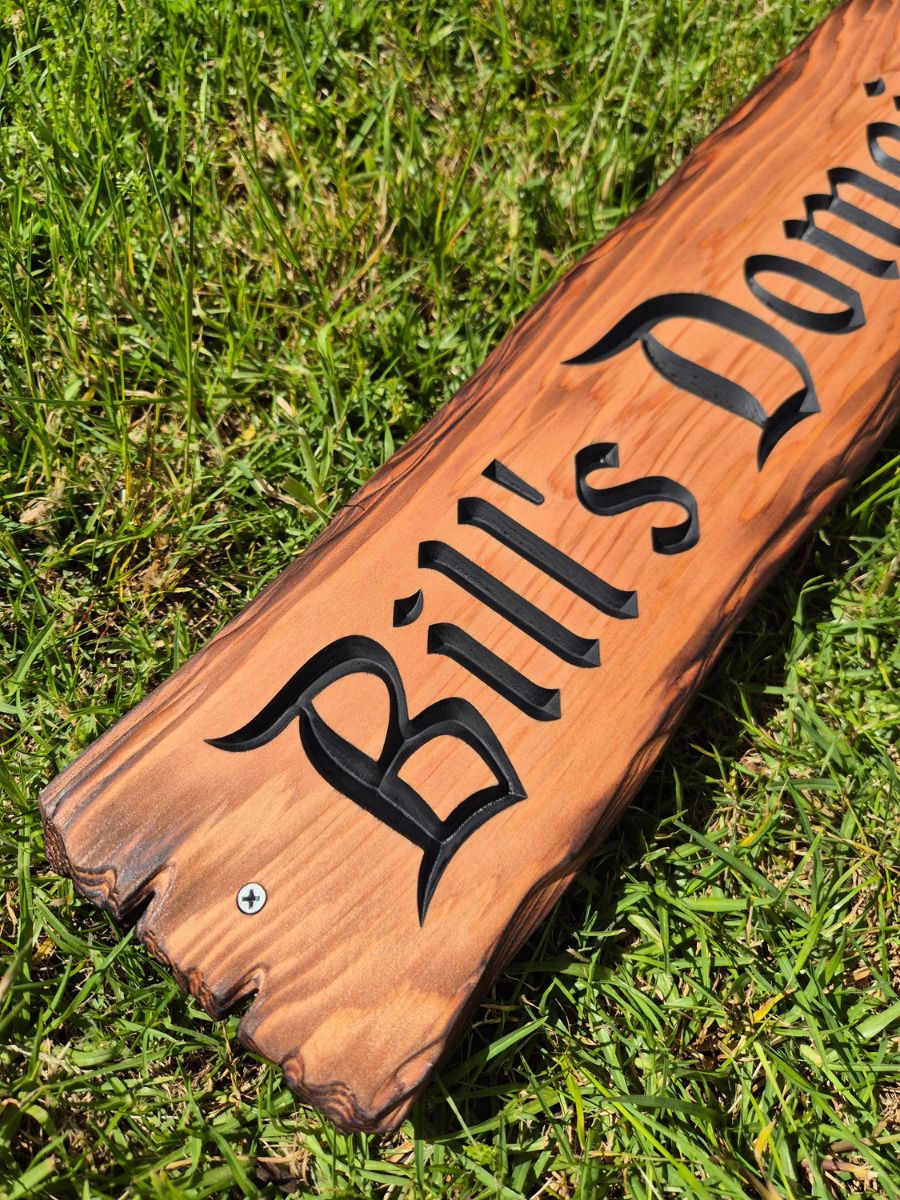
Epoxy Enamel
The epoxy enamel I used on the sign in the photo above works well for a number of reasons. It comes out of the nozzle consistently (not too thick & not too thin), builds up a good coverage with just one coat (no undercoats needed), doesn’t drip or run (if you apply it right) and most of all it has a very nice flat finish. If you don’t know what flat or matt means, it’s simply a way of saying the paint has very little sheen once fully dry. It almost looks like black charcoal, which I love, and I think it really suits the rustic-style signs I make – especially the western-style signs with scorched edges.
There is however a difference between Matt and Flat paint that most people don’t realise.
What’s the difference between flat and matt paint?
Flat and matt paints (Matte in USA) are very similar, and neither produces much shine.
The main difference is how much light they reflect.
Flat paint generally has the least sheen, typically around 0–1% gloss, giving it an almost completely non-reflective appearance.
Matt paint usually has a touch more sheen, often around 2–4%, which can give the surface a slightly softer, velvety look.
It’s a subtle difference, but one you can sometimes notice when comparing painted lettering on natural timber.
I may use the words ‘flat’ or ‘matt’ interchangeably in this article.
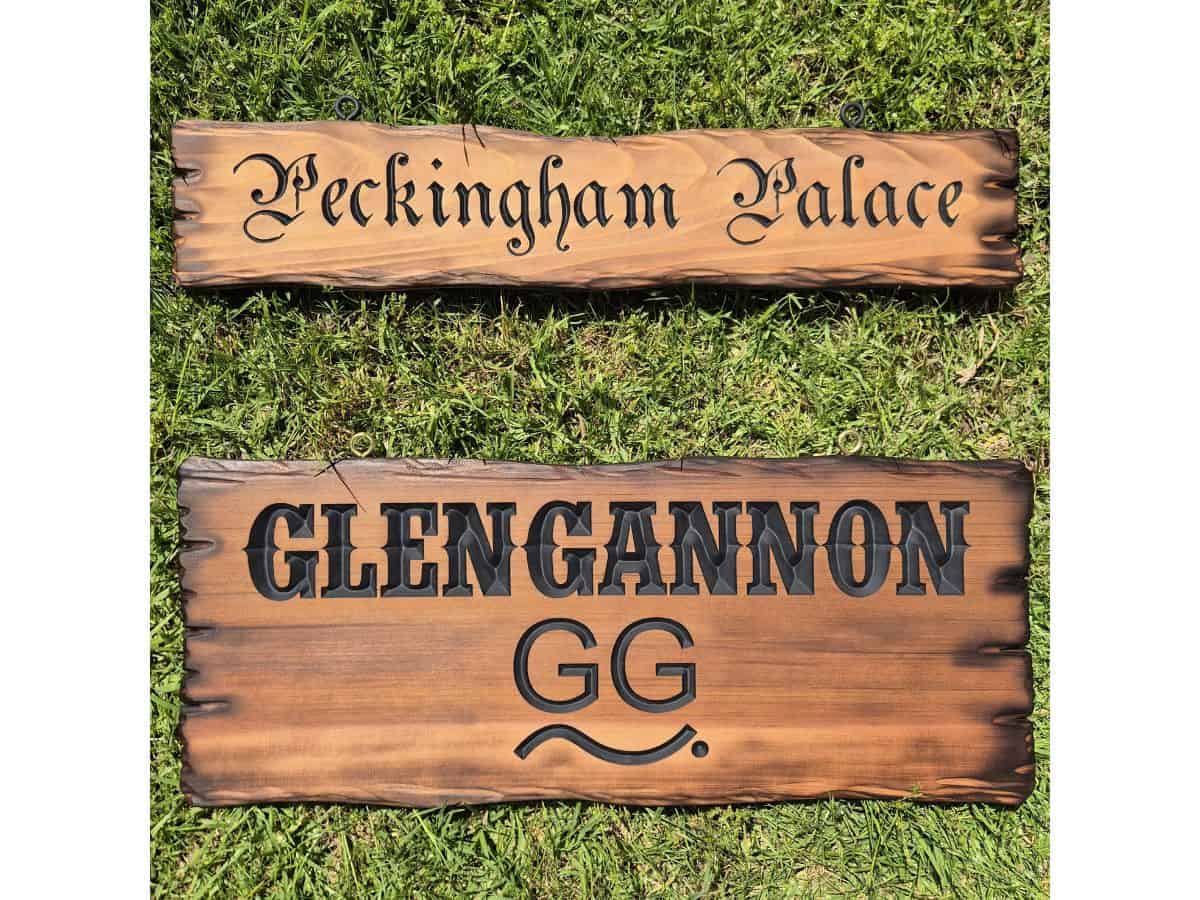
These photos were taken while the decking oil was still drying. Once fully dry, the sign will lose that sheen and have a more consistent flat finish – especially around the charcoal edges, where I wipe away any excess charcoal powder before finishing.
The top sign ‘Peckingham Palace’ was for a chook shed. I’ve actually made quite a few signs for chook sheds — those chooks must be spoilt!
Spray Paint Time
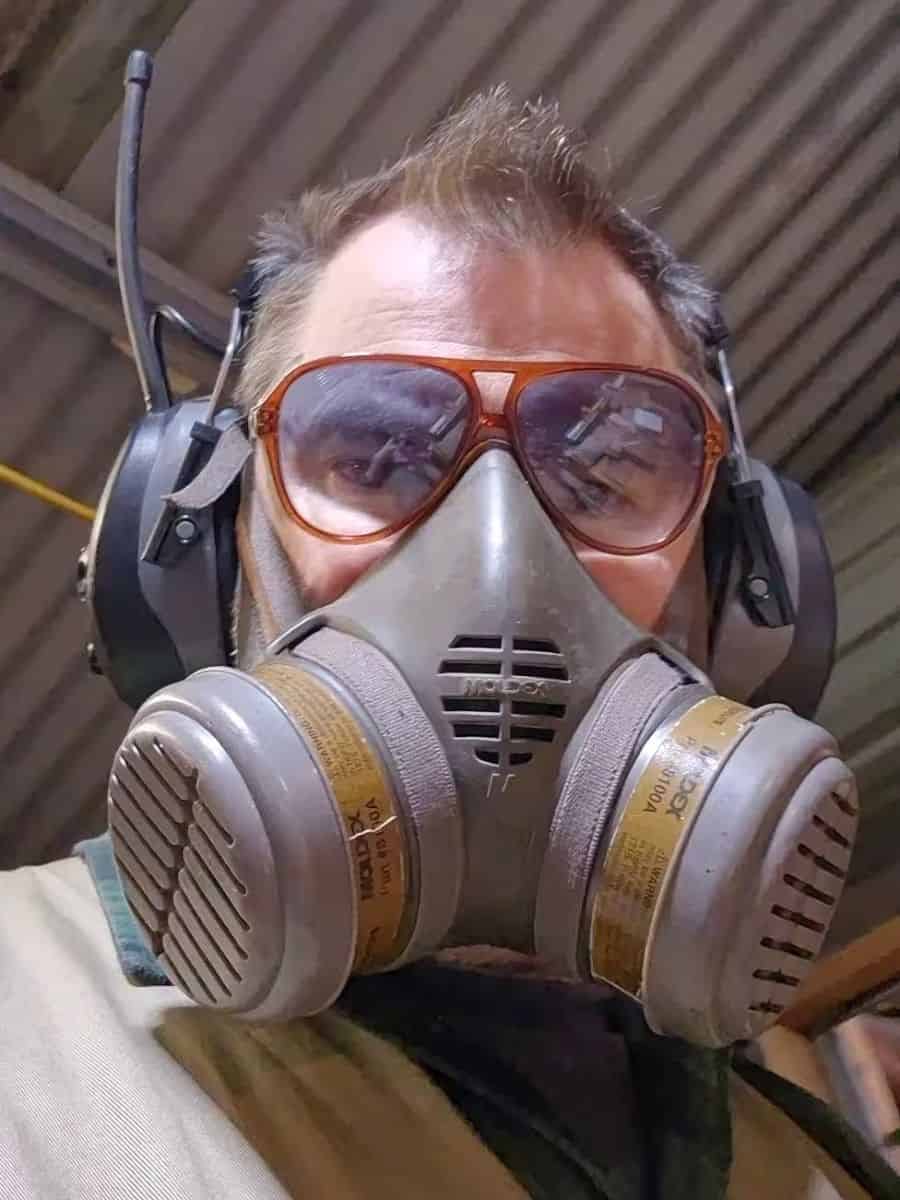
Okay, I’m ready. Safety gear on and I’ve shaken the cans — like a Polaroid picture.
Let’s spray on the paint
Hang on a minute, you’re rushing ahead banging your pots and pans too early. What did I tell you about rushing ahead?
Remove the burrs and rough bits first
Before I start painting, I always inspect the carving carefully. Depending on the timber, the router bit can leave behind small fibres, burrs and fuzzy edges that need to be cleaned up first.
If you paint over them, they’ll become part of the finished sign – and once they’re covered in paint, they tend to stand out even more (white paint especially).
These defects may be caused by the natural grain of the wood or by a knot, or they may be left behind during the carving/routing process. This can be especially noticeable if you’re using an old router bit whose cutting edges are getting a bit dull – perhaps one you haven’t changed since you last went to the dentist.
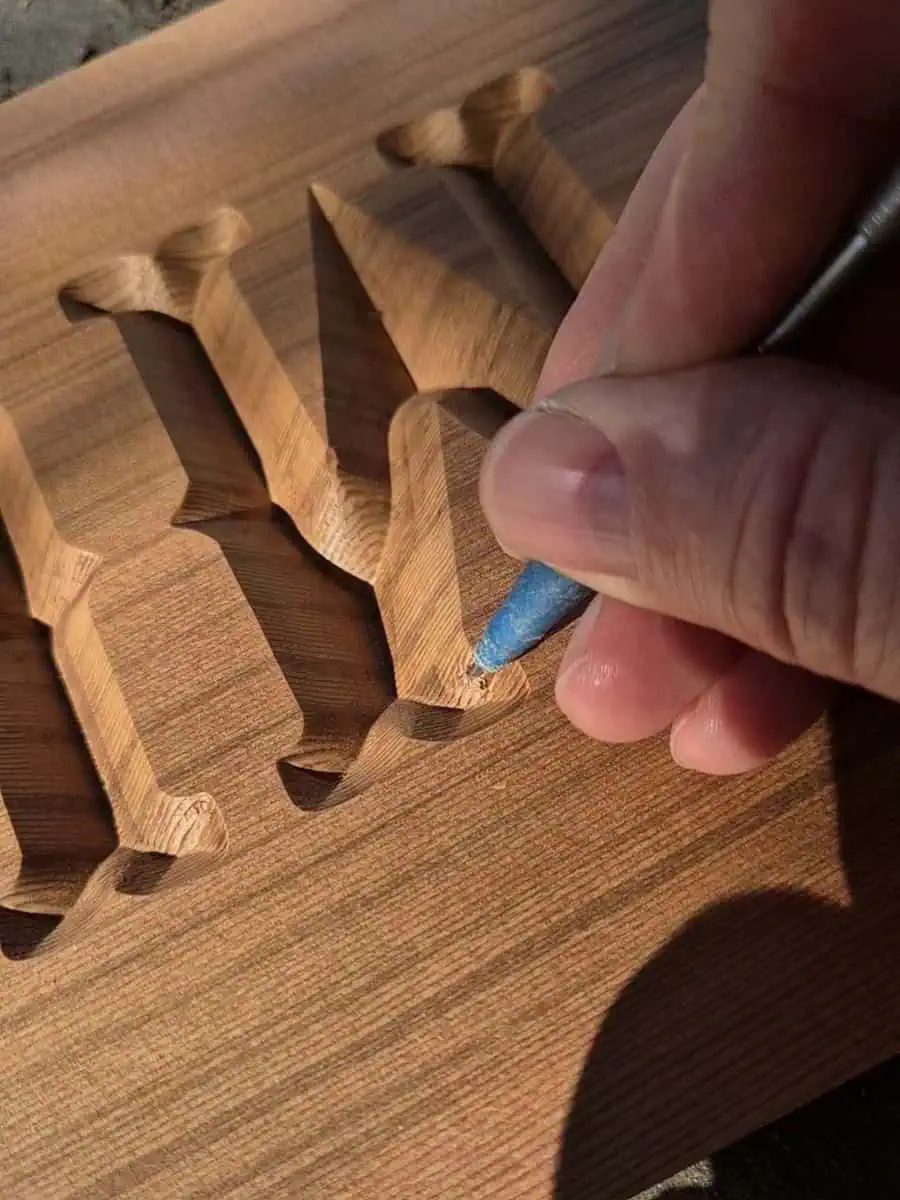
This can vary with different fonts and even with the timber, depending on how dense the grain is in that area.
This is particularly important when I’m using a serif font. Serifs are the small finishing strokes you see on the ends of letters in fonts such as Times New Roman. They can look fantastic carved into timber, but all those little corners and fine details give the router bit more opportunities to leave small bits behind.
A sans-serif font, by comparison, doesn’t have those little finishing strokes.
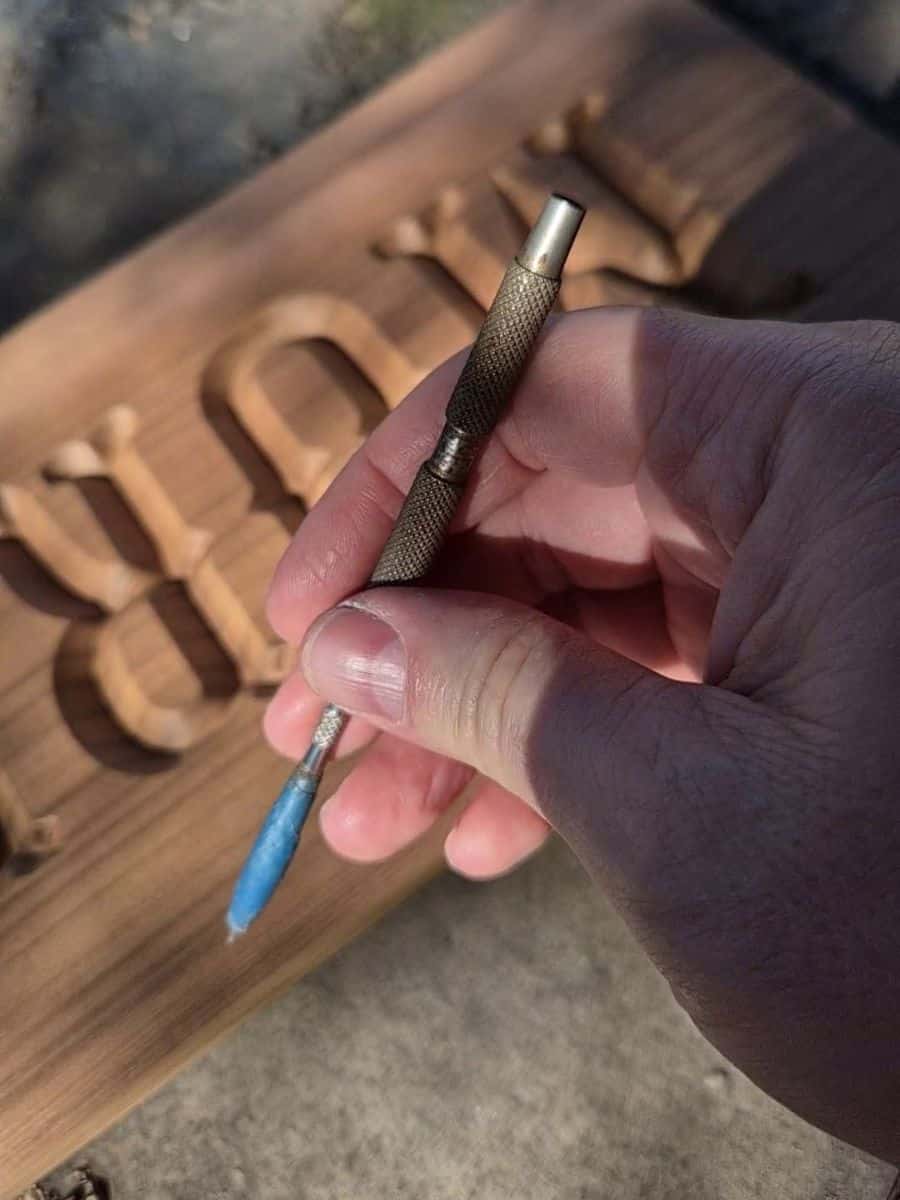
To clean up these areas, I use a scribe. It’s great for getting into the small corners of carved letters and removing any little fibres or pieces the router bit has left behind.
I’ve actually modified one of my scribes specifically for this job.

The scribe on the left is a standard one with the 90-degree bent point still intact. That end is designed for getting into awkward areas when marking or scribing – although I have to admit, that’s not what I use mine for. It’s very sharp and just seems dangerous to me.
For sign making, I’ve unscrewed this top part. It gives me a small, sharp tool that I can use to clean out the corners and fine details in carved lettering.
I remove this end for safety as I really don’t want to poke myself in the eye when I have my head down making signs. It’s one of those simple little things that stops me doing something stupid when I’m rushing. I recommend you keep it that way too.
Or keep a cork on it just like Ruprecht has to do.
“Keep the cork on the fork” — a running gag from the 1988 comedy
Dirty Rotten Scoundrels. GIF via Tenor.
Continue cleaning up any fuzzy bits with the now ‘safety improved’ scribe, then…
Blast it with air when done
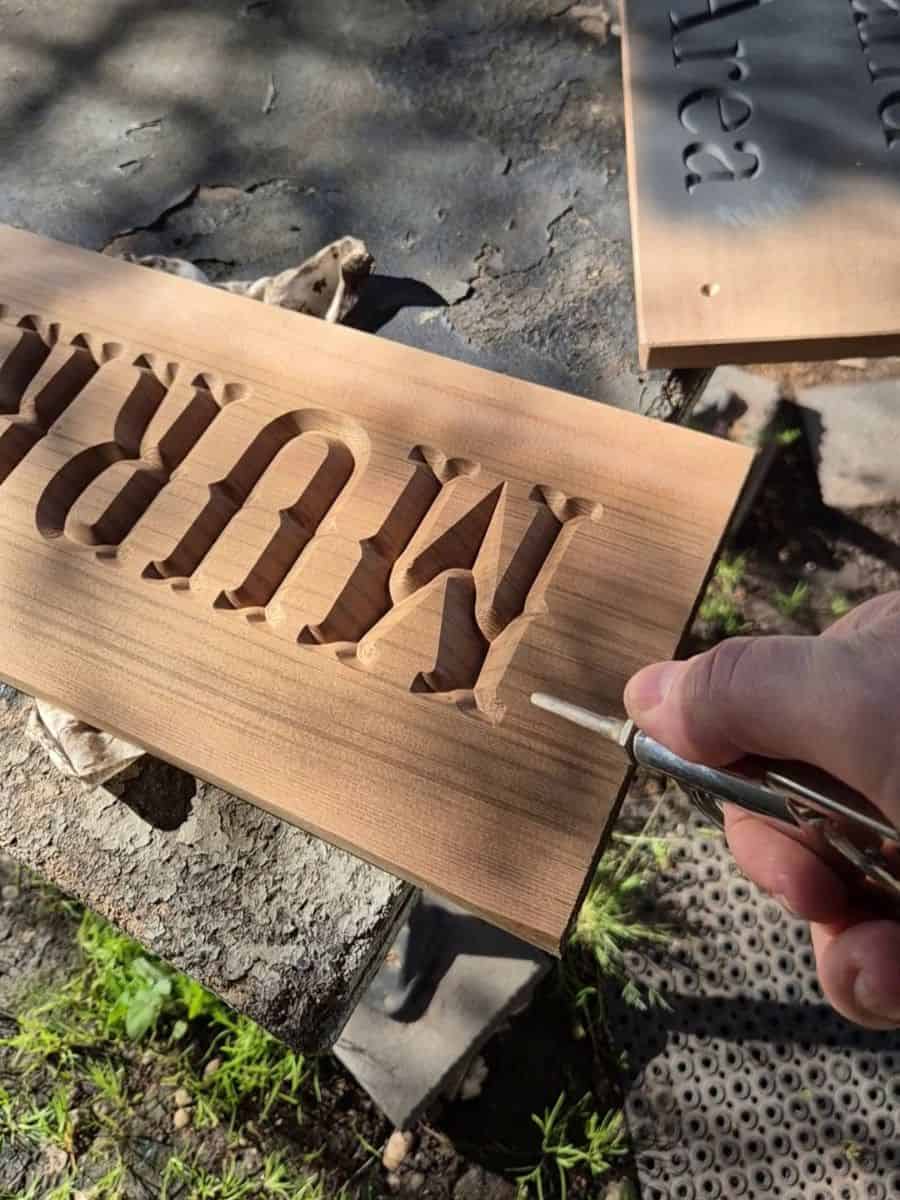
Give it a quick blast with compressed air when done to remove any leftover crumbs from the deburring process (or your lunch break).
I blow everything out thoroughly before painting. There’s no point spending all that time cleaning up the letters only to leave dust and loose fibres sitting in the bottom of them.
Compressed air makes quick work of it, but wear eye protection – particularly when you’re blowing debris out of a carving straight back towards yourself.
Let’s get back to the painting process…
Spraying the Paint
Once the carving is clean and free of dust, it’s time to paint.
Before I go anywhere near the sign, though, I give the can a really good shake. It sounds obvious, but the pigments and other ingredients in spray paint need to be properly mixed. I also like to give the can a quick test spray on a scrap piece of timber or cardboard before starting on the actual sign. This also gives me a chance to practise my ‘can control’.
What is Can Control?
The first thing you need to work on is keeping the can moving in a consistent motion so you don’t build up too much paint in one place. In graffiti circles, they call this ‘can control’.

Melbourne is well known for its street art and lane-way graffiti
– perhaps some of that can control has rubbed off on me over the years.
No, that’s not me in the photo, settle down! Although I do have cargo pants and a black hoodie like that.
When I’m not wearing my rave pants.
(image is AI-generated — for entertainment purposes only, folks)
I’m certainly no graffiti artist, but the same basic principle applies when I’m painting a sign. I want the can moving before I press the nozzle, then I spray across the lettering in one smooth pass rather than starting and stopping directly over the carving.
Distance from the sign
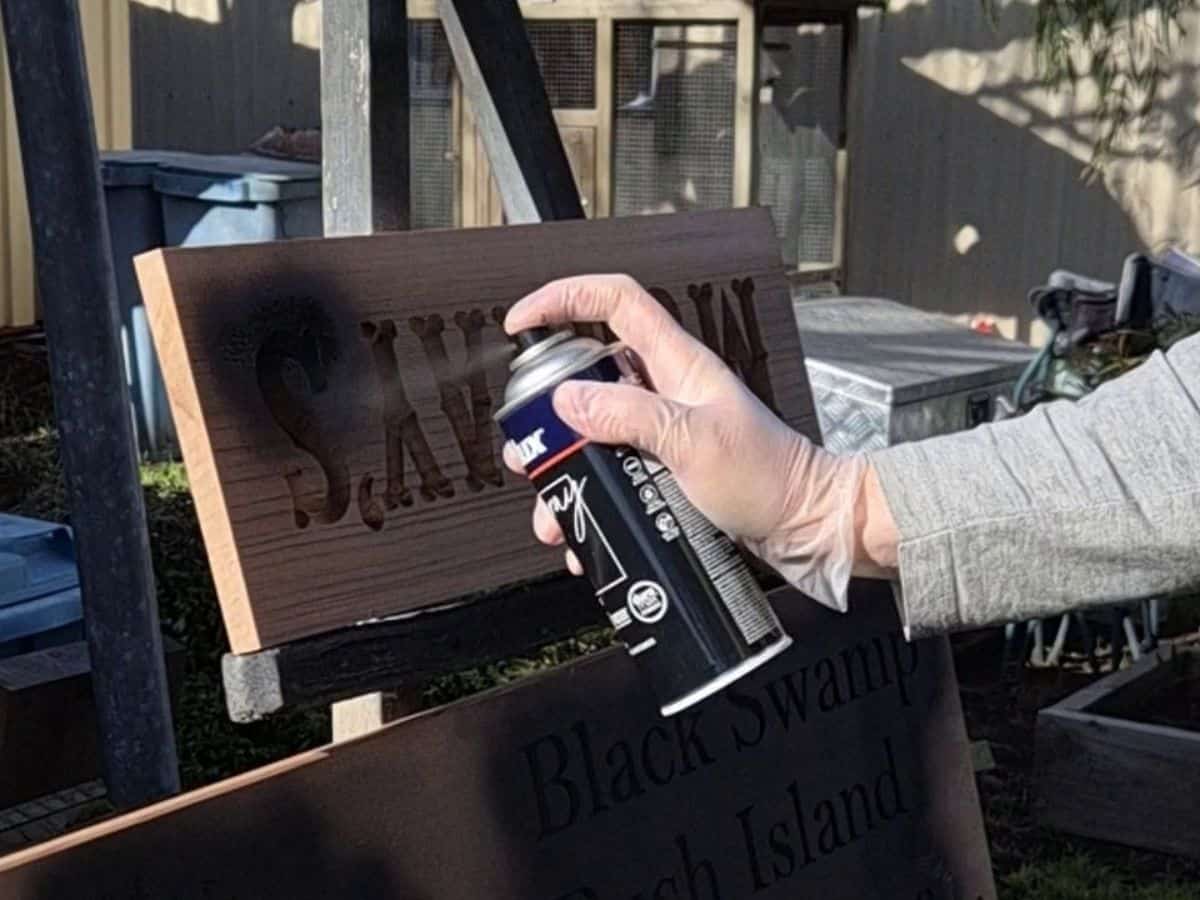
Distance from the sign matters too. Get too close and you can dump far too much wet paint into one area. Too far away and you lose control of the spray and waste half the can painting everything except the sign (especially on windy days).
After doing this for years, I don’t measure the distance – I just know roughly where I want the can to be. If you’re new to spray painting, practise on some scrap timber first until you get a feel for it.
I always start with the sign upside down, then flip it over and finish with another light coat the correct way up. This helps me get more even coverage into the carved lettering. This ensures even paint flow and less panicking – if I get the runs.
(I might be lactose intolerant okay)
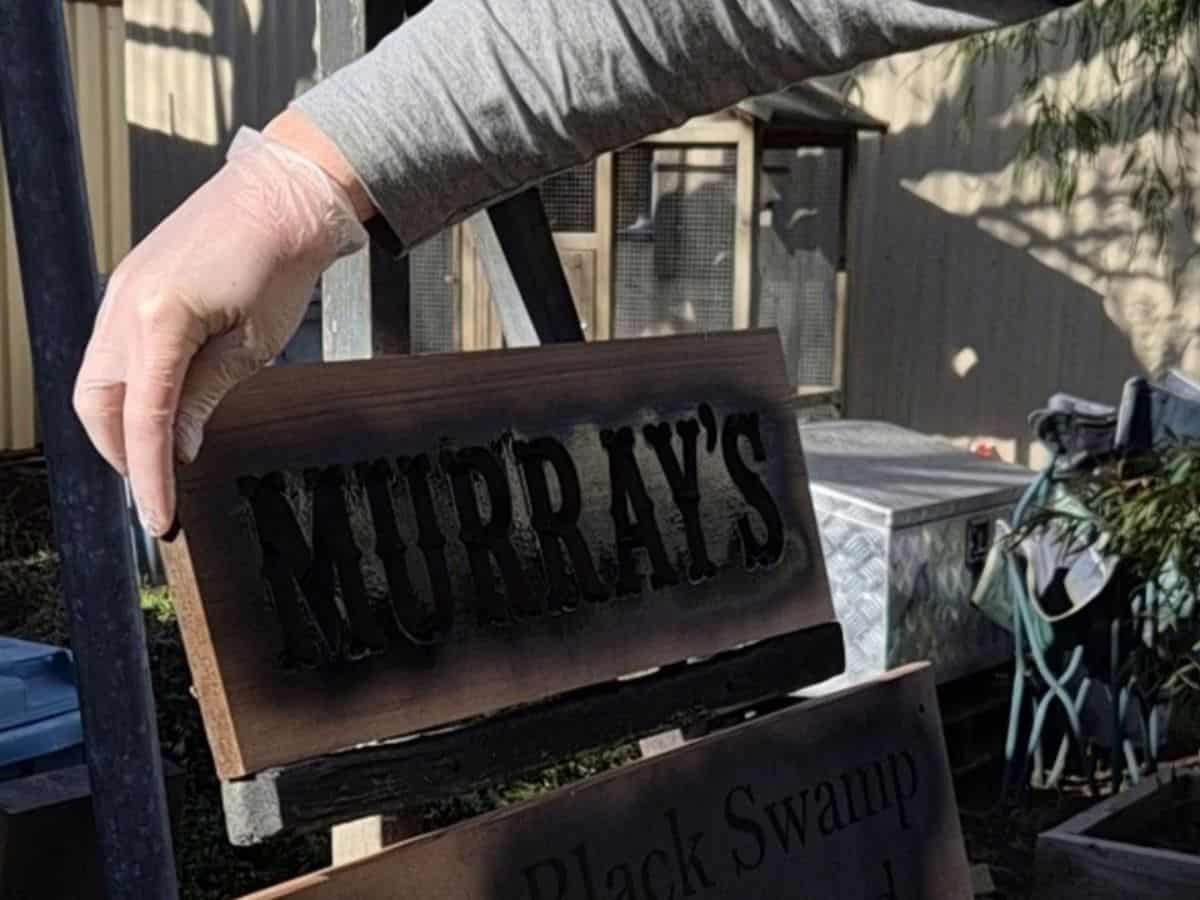
One light pass from both directions is best
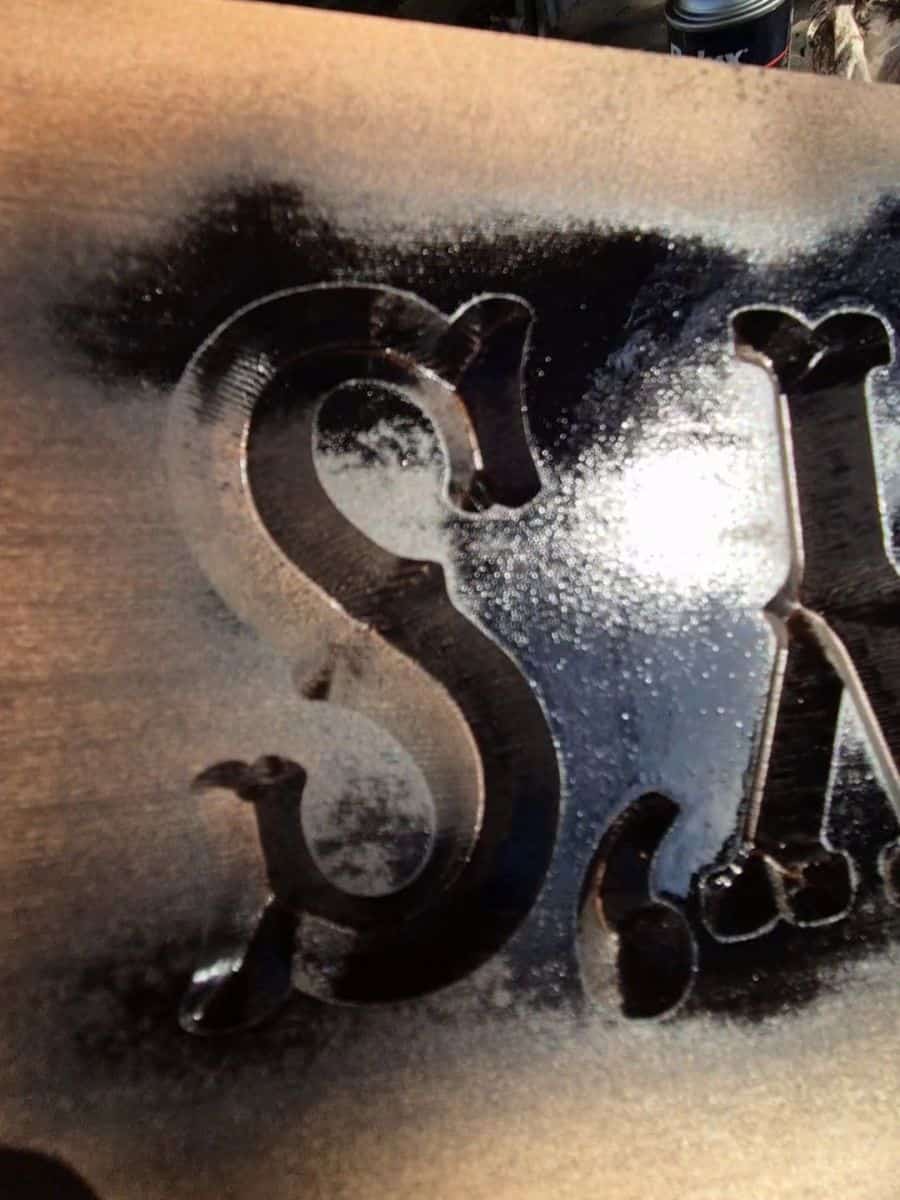
The first coat should be a very light pass.
This helps avoid applying large amounts of paint in a single area. Excess paint can bleed into wood fibres. Don’t be tempted to immediately go back over the areas you’ve missed.
Let that coat flash off before going back over it. Build the colour gradually with several light coats. Avoid one heavy coat that could cause excess paint to disappear into the timber grain. (see dog’s breakfast reference above)
Another reason I don’t want to flood the carving with paint. It takes us back to the signs at the beginning of this article. Those ugly black streaks illustrate the point.
Timber grain can behave a bit like a bundle of tiny straws. If enough thin, wet paint gets into the carving, it may wick along fibres and spread further. That means painting beyond the intended area.
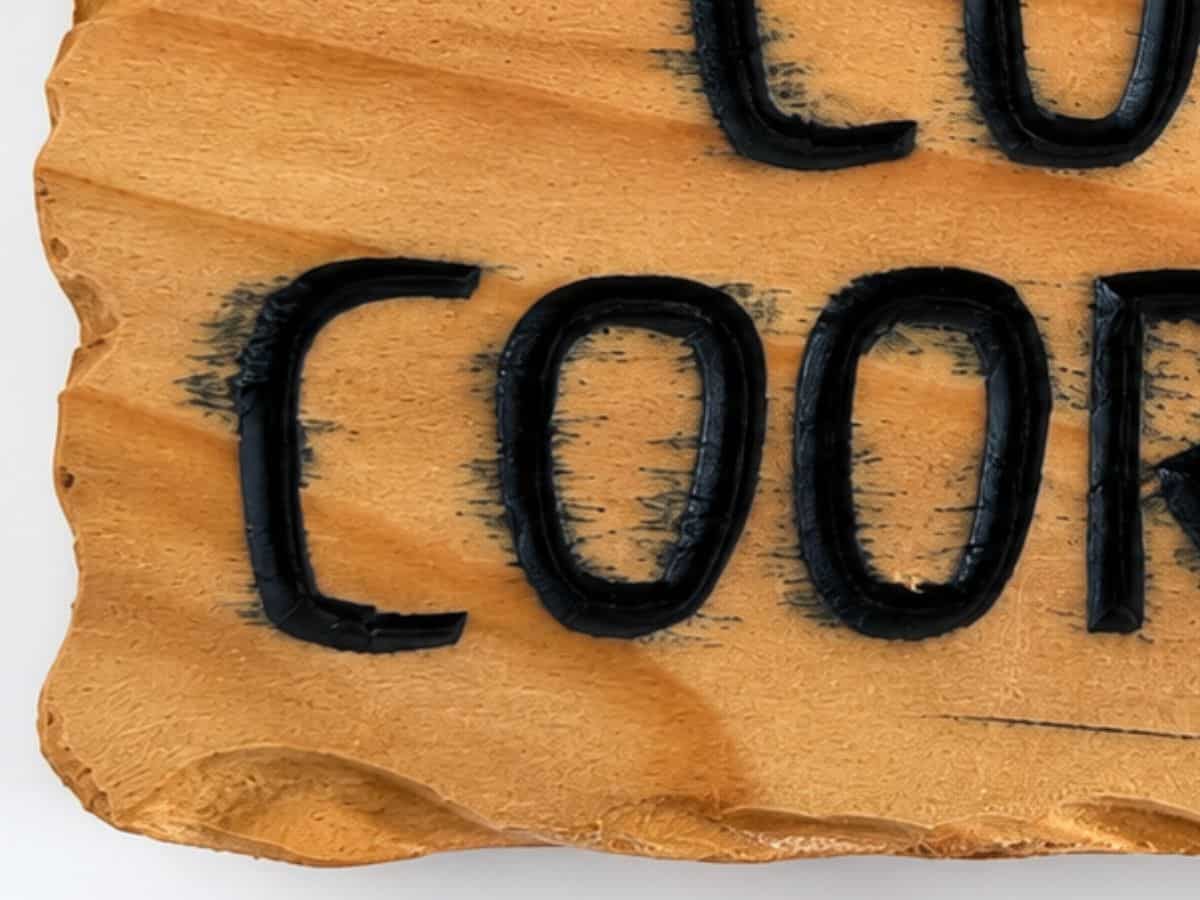
You might think, “No worries, I’ll just sand it off.”
I’ve thought that too.
The trouble is, if the paint has travelled down into the grain, sanding away the surface can simply expose more stained timber underneath. Keep sanding and eventually you start changing the surface of the sign, softening details, removing line thickness on fonts and potentially making the whole thing worse.
Prevention is considerably easier than trying to fix it afterwards.
If the paint looks a bit light on, don’t panic. You’re not trying to get full coverage yet.
Give it a little time, then come back with another light coat. Build the colour gradually until you have the coverage you want.
And if you do have some areas where the paint is too thick, just rock it back a few times or hold it up vertically and allow those drips to even out in whatever directions they need to rather than forming puddles or bubbles in one spot.
Do this quickly before the paint starts to thicken or dry then let the sign sit flat to even out.
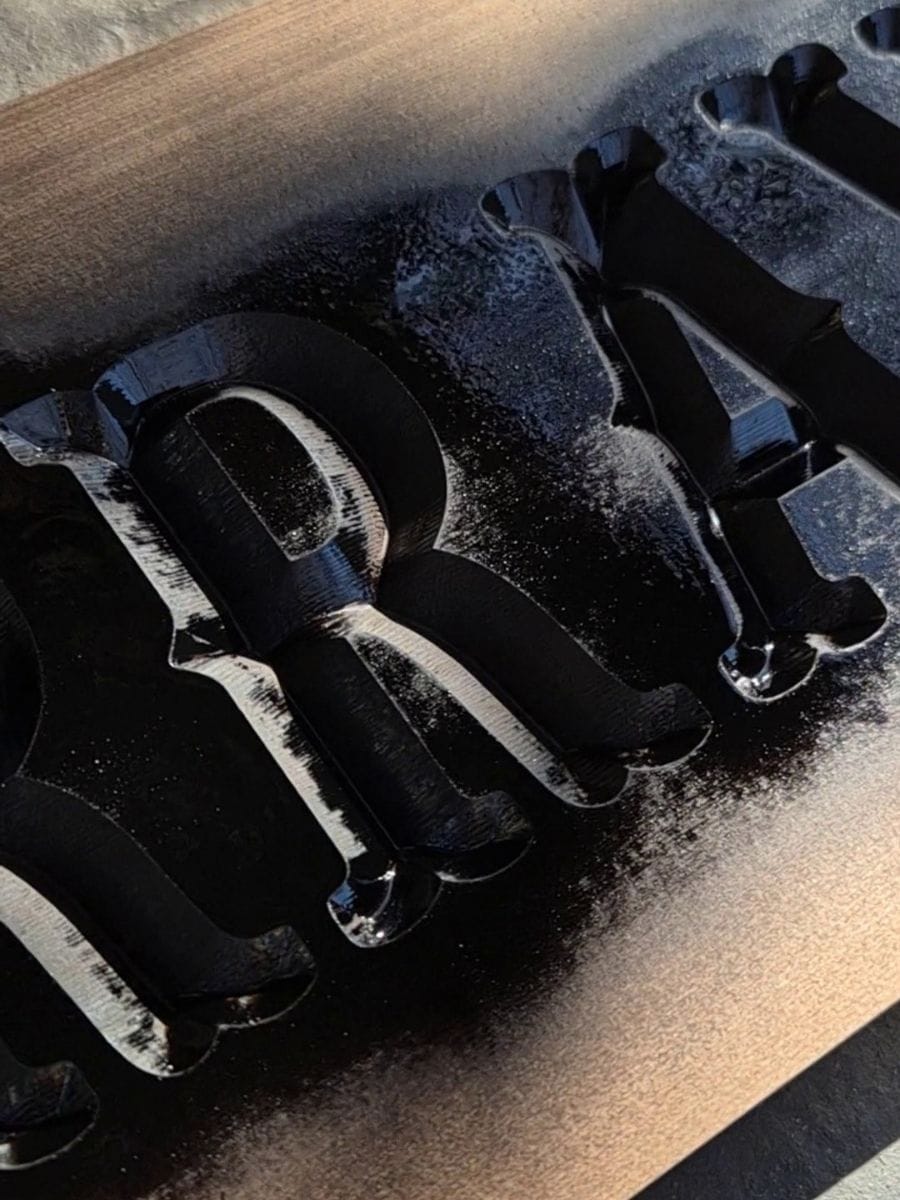
Timber grain can behave a bit like a bundle of tiny straws.
Once I’m happy with the coverage, I leave the sign lying flat somewhere warm, dry and well ventilated and give the paint plenty of time to dry. (Sometimes I put mine in the sun or in my wife’s lounge room if it’s the middle of winter.)
How long I leave between coats depends on the paint I’m using and the conditions on the day, so check the instructions on your particular can. The fast-drying paint I’m using on the MURRAY’S sign only took about 10 minutes to dry before recoating.
(maybe 20 minutes today because I had a longer coffee break)
For this stage, I’d much rather the paint be too dry than not dry enough.
If I’m not sure, I’ll leave it longer — I’ll go find something else to do for a while, like have another coffee break.
IMPORTANT NEXT STEP — Let the Paint Dry
Once you’ve got your can control under control (from thorough practice around your local neighbourhood at night), you’re ready for the next step – sanding the paint back off the surface. But first, the paint needs to be properly dry.
Give it the finger
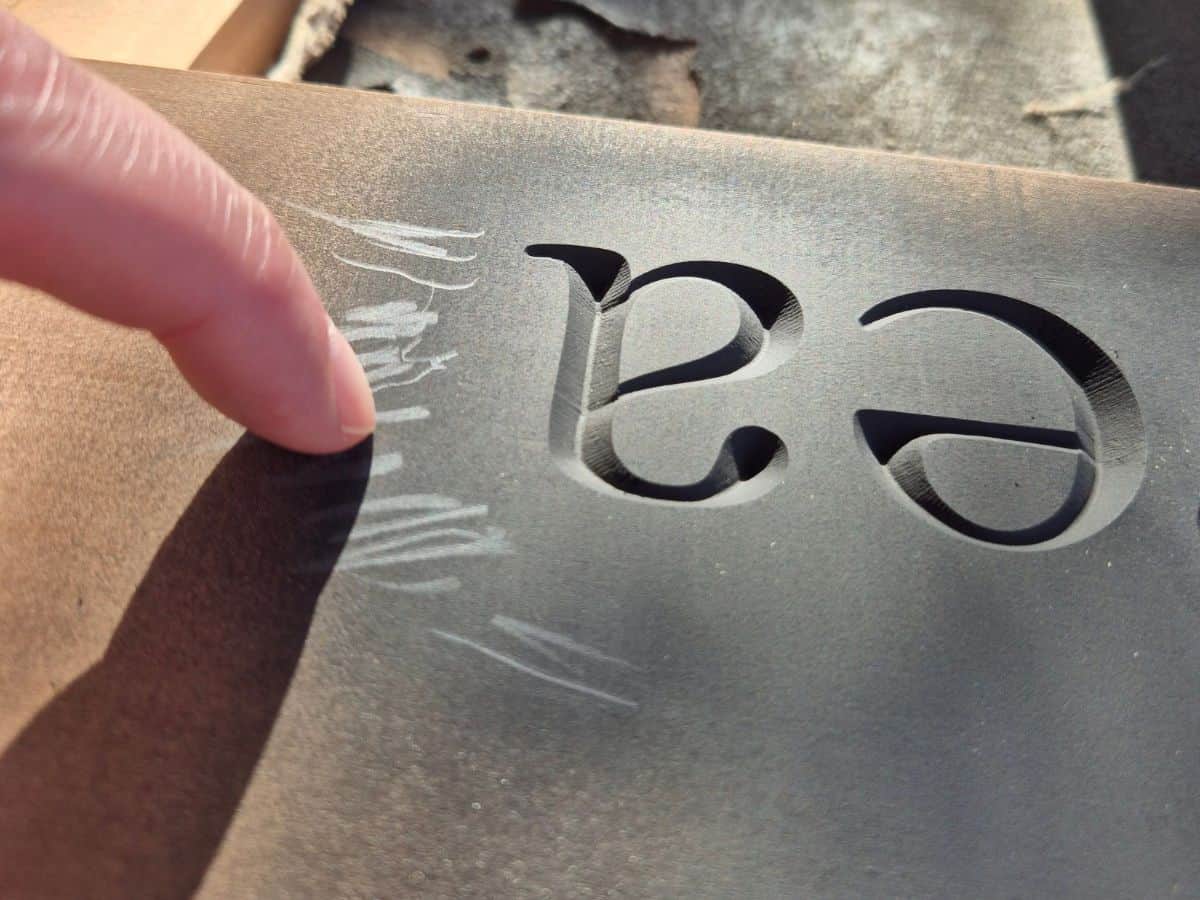
Before I move on to the finishing stage, I want to make sure the paint really is dry – not just touch-dry on the surface.
One quick way I check whether the paint is dry enough is the fingernail test.
I gently scratch an inconspicuous area of over-spray with my fingernail – somewhere that will be sanded off later. If my nail stays clean and the paint doesn’t feel soft or mark easily, I know I’m getting close.
If the paint still feels soft or rubbery, or marks easily, I know it needs more time.
I’m deliberately testing an area that will be sanded away later — don’t go digging your fingernail into the lettering you’ve just spent all this time painting.
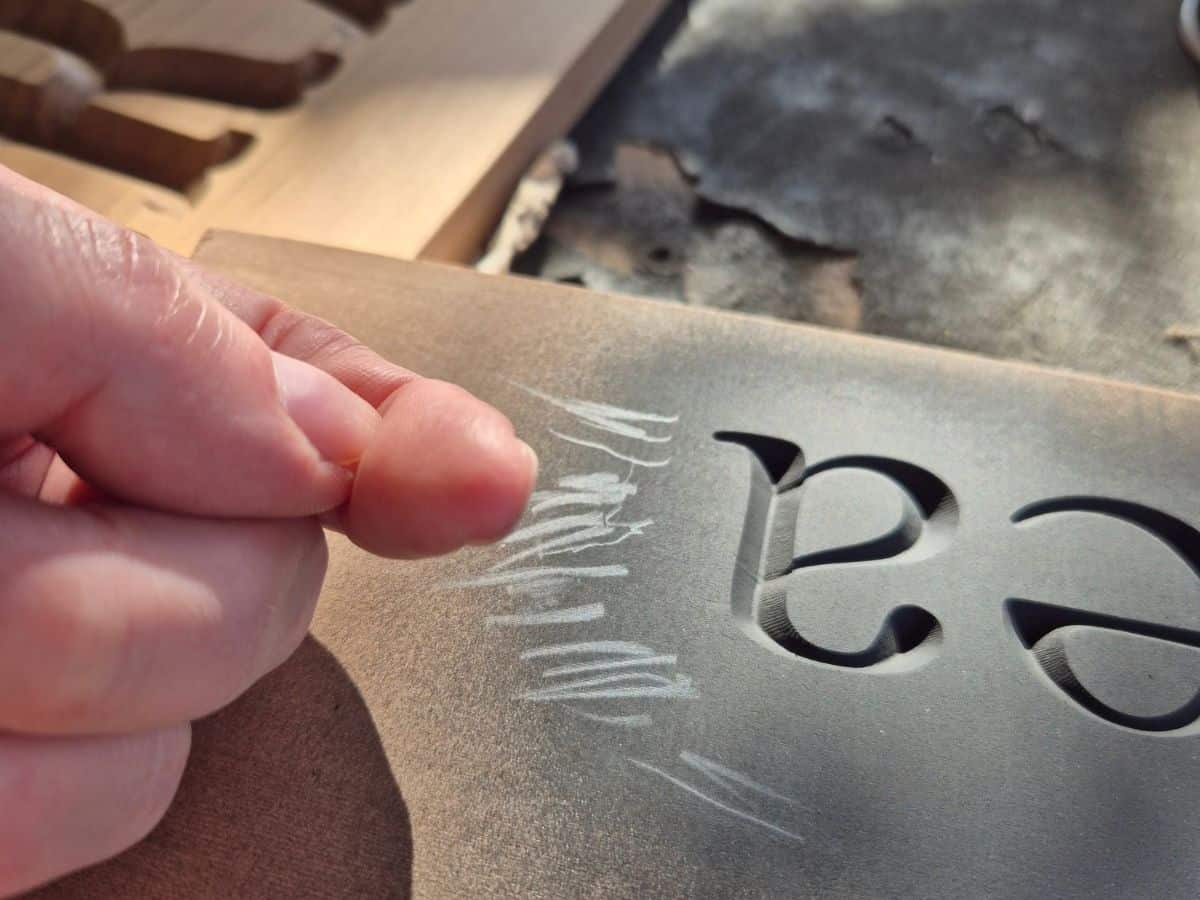
If your nail stays clean with no paint sticking to it, that usually means it’s dry enough.
At this stage, I’d much rather the paint be too dry than not dry enough. If you’re unsure, wait a little longer. In the meantime, do something else. For example, take your wife out for lunch instead of a coffee break. The sign will still be there when you get back.
NEVER START SANDING BEFORE IT’S FULLY DRY!
This drying stage becomes particularly important because painting isn’t the end of the finishing process.
Once the surface has been sanded clean, I still need to apply the final finish to the timber. If the paint hasn’t cured sufficiently, the finishing process can soften it, smear it or drag black pigment into places where I definitely don’t want it.
That’s another reason the paint I choose has to work with the entire finishing process – not just look good when it comes out of the spray can.
Then begin sanding the surface
Once I’m satisfied the paint is dry enough, I sand the face of the sign to remove the over-spray and reveal the clean timber again, leaving the black paint down inside the carved lettering.
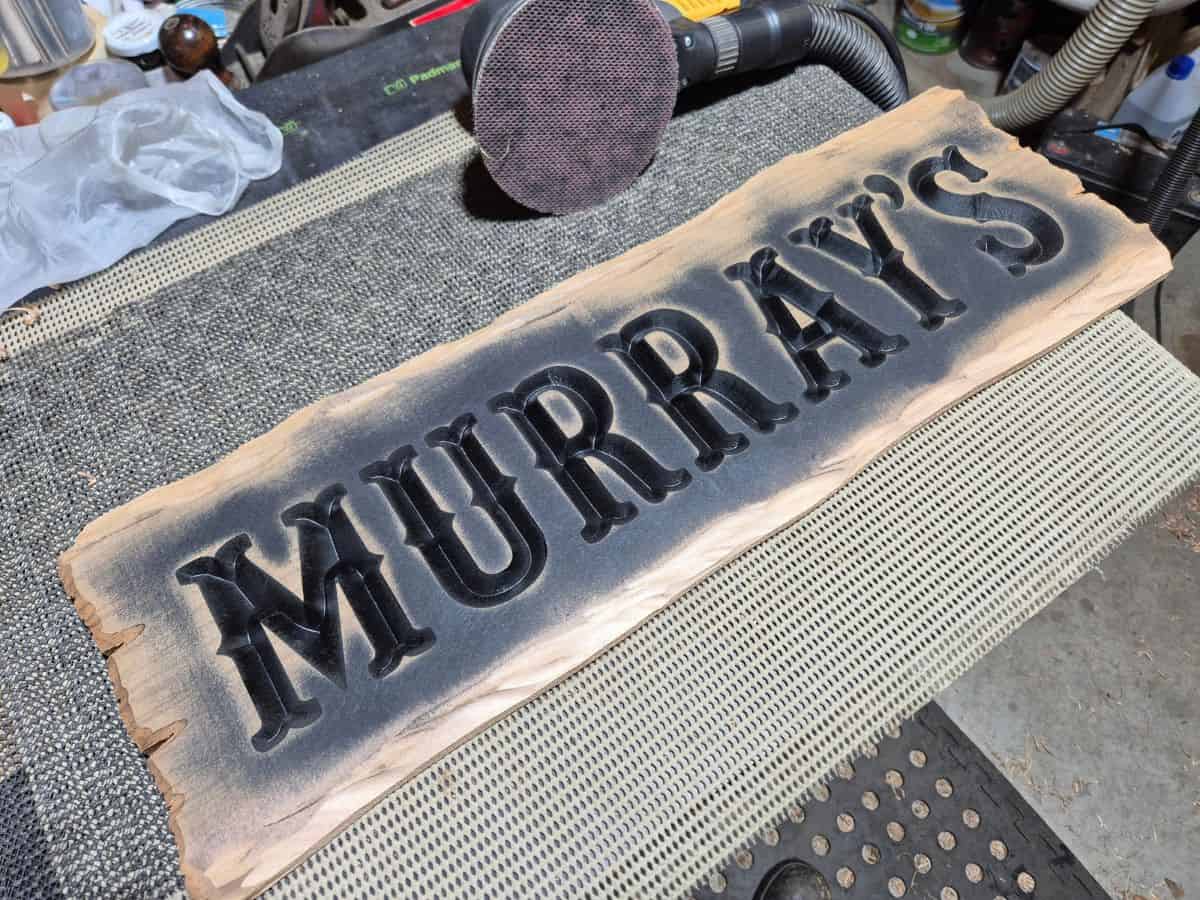
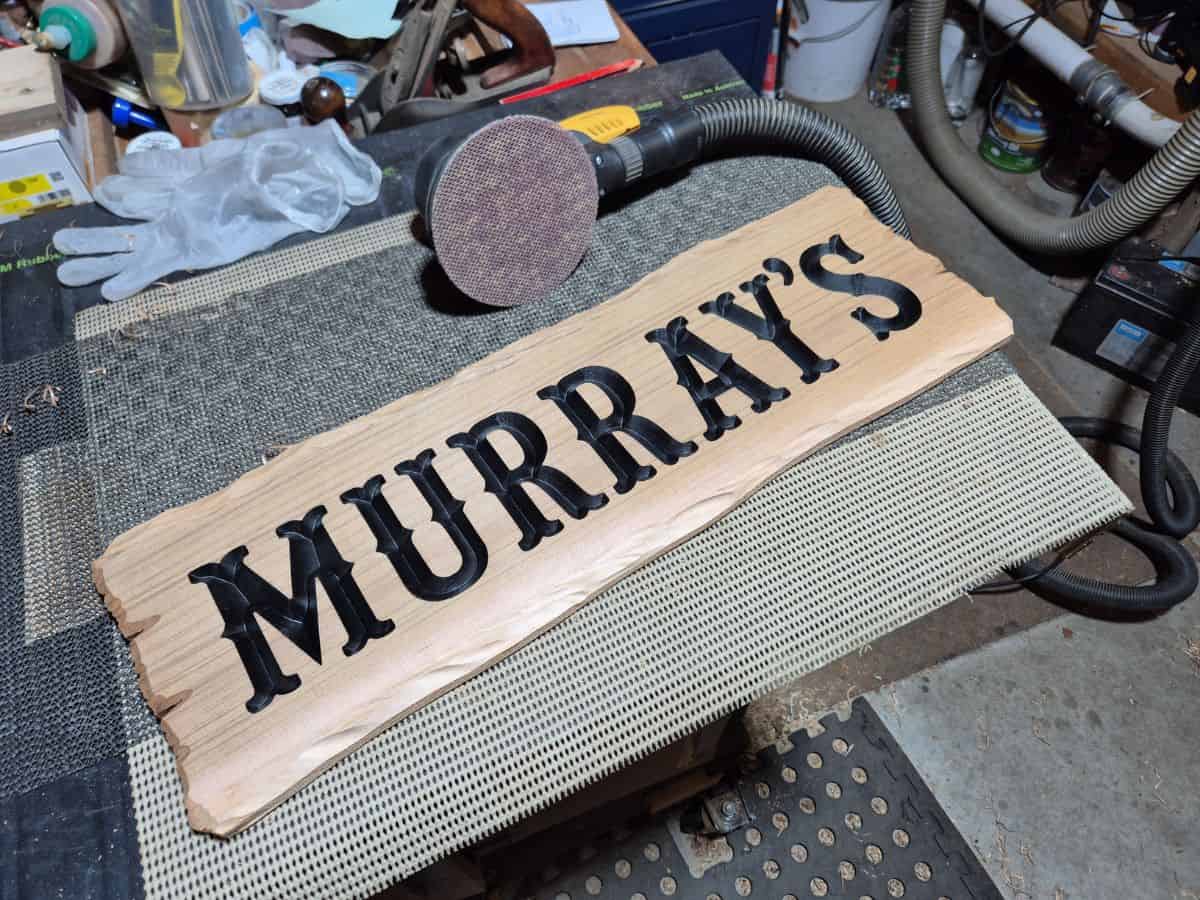
This is one of my favourite stages because the sign suddenly starts to come together. What looked like a dog’s breakfast a little earlier begins to look like the finished product.
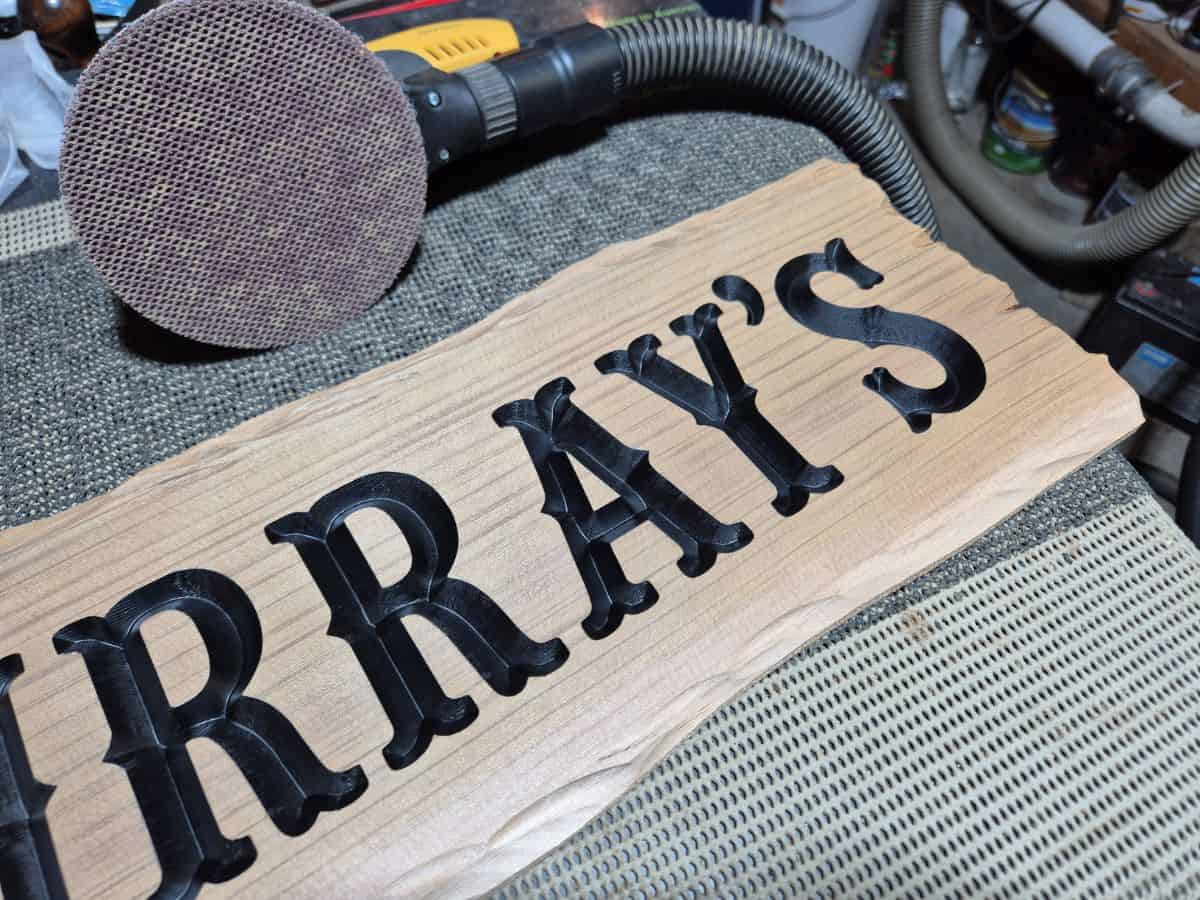
I’ll talk more about sanding in future posts, and also some great tips on how to prevent the sandpaper from clogging.
Applying the oil
I’ll keep this relatively short because this article is about painting, and timber finishing can become another article in its own right. (I will be talking more about this soon.)
After sanding and removing all the dust, the sign is ready for its final finish.
The finish brings the colour and grain of the timber to life and gives the sign that completed look. But this is also the moment when any shortcuts taken earlier can come back to haunt you.
If the paint hasn’t dried properly, this is where you risk smudging or dragging colour across the timber.
So once again: don’t rush it. Keep the systems in place. Keep the cork on the fork.
Here’s the finished sign after applying my favourite decking oil.
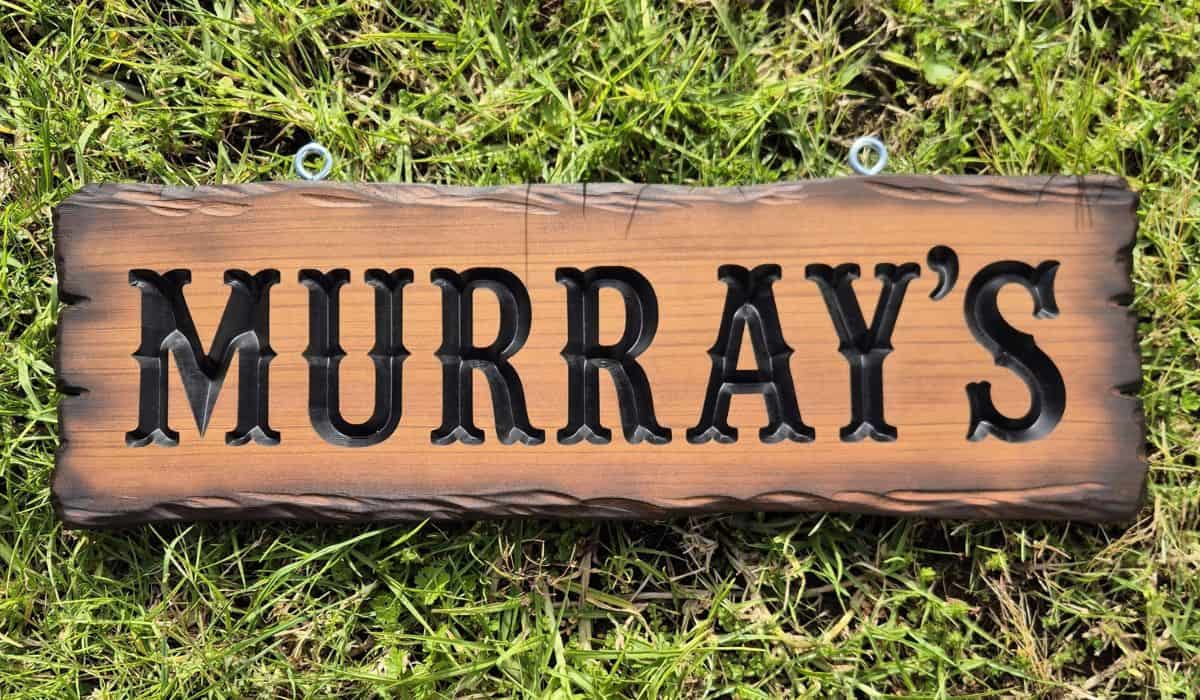
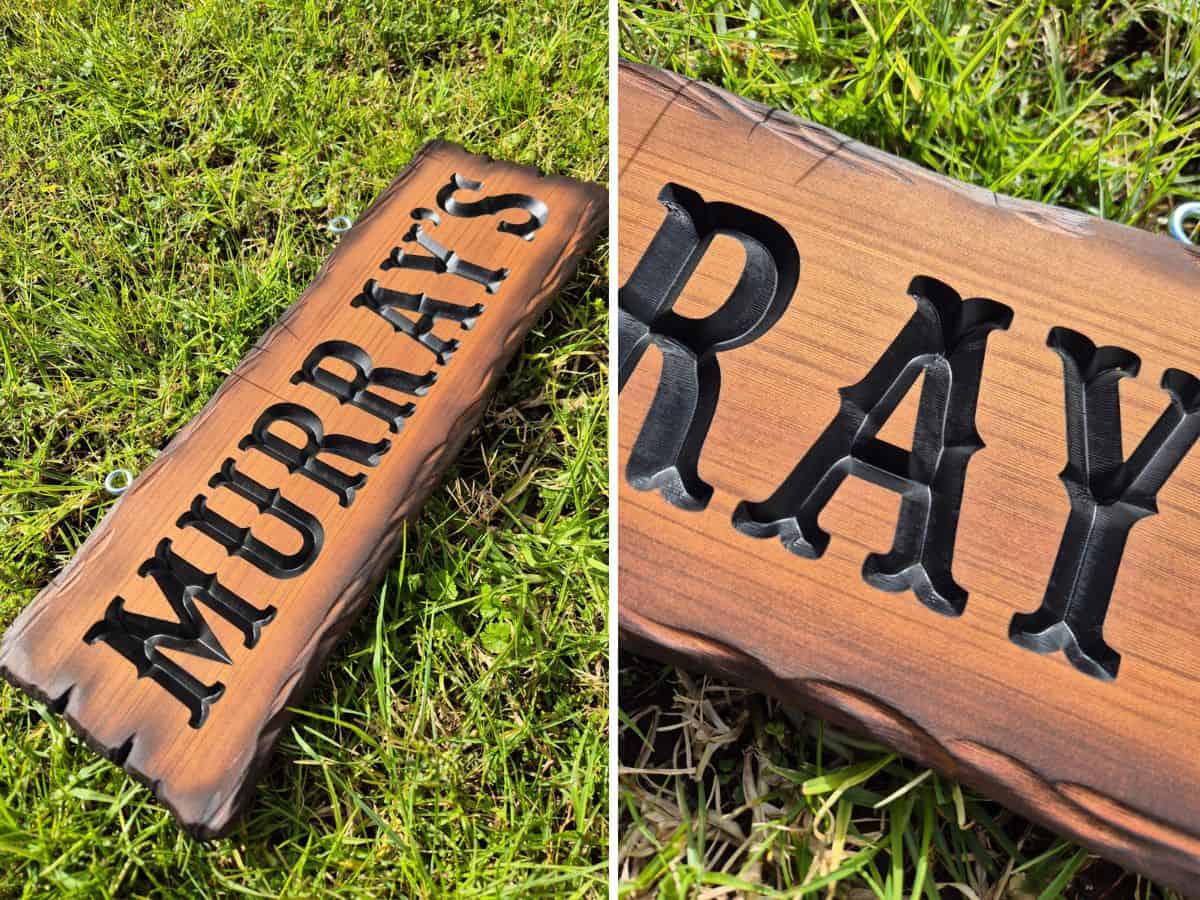
The finished sign is now on its way to one of my customers in Queensland.
Enough rambling
This has turned into a considerably longer article than I planned, and there are still plenty of important details to cover if you want to avoid the sort of painting headaches I showed you at the beginning.
So rather than turn this into a small novel, I’m going to leave the rest of the painting process for Part 2.
Of course, black lettering is only the beginning.
Things become considerably more interesting – and considerably easier to stuff up – when you start adding multiple colours.
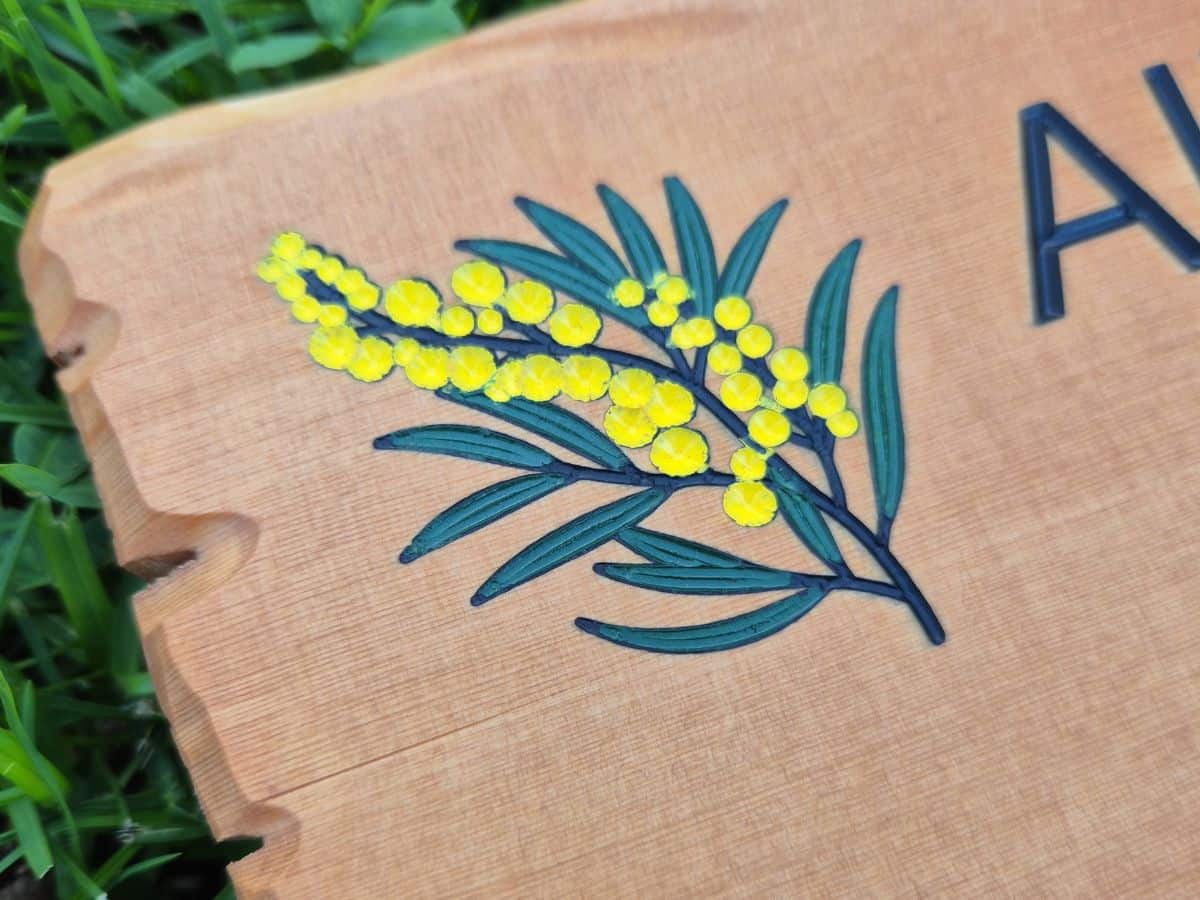
This wattle design uses yellow, green and dark colours within the carved timber.
Three colours are considerably trickier than one. In a future post, I’ll show you how I tackle multi-colour signs and make the process as stress-free as possible – including how I use masking film between colours.
If you don’t want to miss that one, make sure you’re subscribed.
So on that note, I think we will leave the rest of the painting details for another article.
More Sign-Making Lessons to Come
There are still plenty of tips and tricks I want to share, including multi-colour painting, using masking film between colours, sanding the overspray back without damaging the lettering, and what can go wrong when the finishing stage doesn’t go to plan.
I’ve made most of these mistakes myself over the years, so hopefully I can save you from making a few of them.
If you’d like to follow along, subscribe to AusWorkshop and I’ll let you know when Part 2 and the next workshop stories are published.
To finish up, here’s a quick YouTube Short showing some of the painting process we just discussed, along with a little trick I use to reuse disposable gloves between coats of paint. Yes, I know I’m tight.
Until next time, have fun and remember —
DO NOT take the cork off the fork!
See you on here again soon. Stay safe and may God bless.
Andrew
AusWorkshop
Thanks for reading AusWorkshop!
Enjoy this sort of workshop stuff?
I share more woodworking projects, sign-making lessons, workshop experiments and the occasional mistake over at AusWorkshop on Substack.